Getting Started with Pebble Mobile
Pairing Pebble Mobile with your workspace is a five-minute, one-time setup: open the Add a device dialog on the web, install the app, scan the QR code, allow the connection, then approve the device back on the web. This page walks through each step.
The install buttons point to the public App Store and Google Play listings by default. Your platform admin can point them elsewhere (for example at an internal-testing build) — if a link doesn’t work for you, ask whoever runs PebbleAI for your organisation.
Before you start
You need:
- A PebbleAI account, signed in on the web (pairing must be approved from a web session — the phone alone is not enough)
- Your phone, with a camera for scanning the QR code
Step 1 — Open the Add a device dialog
- On the web, open Settings → Profile, or go directly to
/settings/profile?section=deviceson your PebbleAI site - Pick Devices from the left-hand menu (described as “Connected apps and devices”)
- Click the Add a device button in the top-right of the Devices section
A dialog titled Add a device opens, showing a QR code with your deployment’s web address printed beneath it, and three numbered steps.
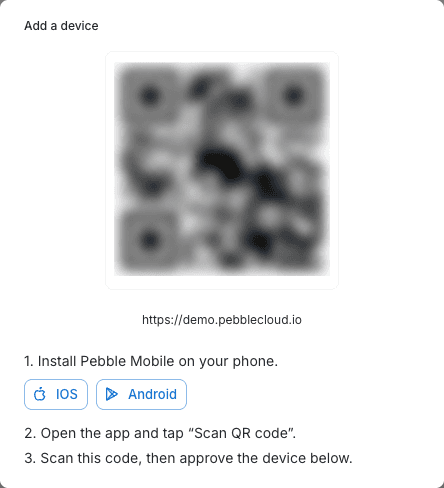
The QR code contains only your deployment’s web address — no passwords, tokens, or secrets. It simply tells the app which PebbleAI site to connect to.
Step 2 — Install Pebble Mobile on your phone
The dialog’s first step reads “Install Pebble Mobile on your phone”, with iOS and Android buttons. These take you to your organisation’s install link for each platform — open the right one on your phone:
| Button | Where it goes |
|---|---|
| iOS | Your organisation’s iOS install link — the App Store listing by default |
| Android | Your organisation’s Android install link — the Google Play listing by default |
Install the app — it appears on your phone as Pebble AI Mobile.
Step 3 — Scan the QR code
- Open the app on your phone
- Tap Scan QR code
- Point the camera at the QR code in the web dialog
Scanning points the app at your organisation’s PebbleAI site, then the app starts the normal device sign-in.
Step 4 — Sign in and allow the connection
The app opens a consent page called Connect a device in your phone’s browser. If you’re not already signed in there, your normal sign-in runs first — password or SSO, whichever your organisation uses — and then bounces you back to the consent page.
The consent page names the device and the account it will connect as — for example, “Sam’s iPhone wants to connect to your Pebble AI workspace as sam@yourcompany.com. It will be able to access your chats, automations and workspace features on your behalf.” — with Deny and Allow buttons.
Tap Allow. You’ll see: “Device authorized. Return to the app — if it did not open automatically, you can close this page.”
Allowing on the phone is not the final step. The device now sits as a pending request and receives no access until you approve it from the web — a device can never approve itself.
Step 5 — Approve the device on the web
Back on the web Devices page, your phone now appears in the list with an amber pending status chip and two icon buttons: a tick (Approve) and a cross (Deny).
Click Approve. A “Device approved” confirmation appears, the app on your phone connects, and you’re in.
Pending requests expire after 15 minutes. If the request disappears from the list before you approve it, just scan the QR code again from the app and repeat the flow.
Troubleshooting
- The pending row never appeared — make sure you tapped Allow on the consent page, and that you’re looking at the Devices page for the same account the phone signed in as.
- “Request denied” on the consent page — you tapped Deny. Start again from the QR scan.
- The app never connected after you tapped Allow — the request may have been denied on the web, or expired after 15 minutes. Scan the QR code again.
- The install button opens a broken link — your organisation’s install links may need updating; ask your platform admin (see Device Management).
Next steps
- Using the App — what you can do once you’re paired
- Device Management — renaming and revoking devices, and what admins control