Couchbase
Enhanced
Direct integration with Langfuse tracing
Prerequisite
Requirements
-
Couchbase Cluster (Self Managed or Capella) version 7.6+ with Search Service.
-
Capella Setup: To know more about connecting to your Capella cluster, please follow the instructions.
Specifically, you need to do the following:
- Create the database credentials to access cluster.
- Allow access to the Cluster from the IP on which the application is running.
Self Managed Setup:
- Follow Couchbase Installation Options for installing the latest Couchbase Database Server Instance. Make sure to add the Search Service.
-
Search Index Creation on the Full Text Service in Couchbase.
Importing Search Index
Couchbase Capella
Follow these steps to import a Search Index in Capella:
- Copy the index definition to a new file named
index.json. - Import the file in Capella following the instructions in the documentation.
- Click Create Index to finalize the index creation.
Couchbase Server
Follow these steps for Couchbase Server:
- Navigate to Search → Add Index → Import.
- Copy the provided Index definition into the Import screen.
- Click Create Index to finalize the index creation.
You may also create a vector index using Search UI on both Couchbase Capella and Couchbase Self Managed Server.
Index Definition
Here, we are creating the index vector-index on the documents. The Vector field is set to embedding with 1536 dimensions and the text field set to text. We are also indexing and storing all the fields under metadata in the document as a dynamic mapping to account for varying document structures. The similarity metric is set to dot_product. If there is a change in these parameters, please adapt the index accordingly.
{
  "name": "vector-index",
  "type": "fulltext-index",
  "params": {
    "doc_config": {
      "docid_prefix_delim": "",
      "docid_regexp": "",
      "mode": "scope.collection.type_field",
      "type_field": "type"
    },
    "mapping": {
      "default_analyzer": "standard",
      "default_datetime_parser": "dateTimeOptional",
      "default_field": "_all",
      "default_mapping": {
        "dynamic": true,
        "enabled": false
      },
      "default_type": "_default",
      "docvalues_dynamic": false,
      "index_dynamic": true,
      "store_dynamic": false,
      "type_field": "_type",
      "types": {
        "_default._default": {
          "dynamic": true,
          "enabled": true,
          "properties": {
            "embedding": {
              "enabled": true,
              "dynamic": false,
              "fields": [
                {
                  "dims": 1536,
                  "index": true,
                  "name": "embedding",
                  "similarity": "dot_product",
                  "type": "vector",
                  "vector_index_optimized_for": "recall"
                }
              ]
            },
            "metadata": {
              "dynamic": true,
              "enabled": true
            },
            "text": {
              "enabled": true,
              "dynamic": false,
              "fields": [
                {
                  "index": true,
                  "name": "text",
                  "store": true,
                  "type": "text"
                }
              ]
            }
          }
        }
      }
    },
    "store": {
      "indexType": "scorch",
      "segmentVersion": 16
    }
  },
  "sourceType": "gocbcore",
  "sourceName": "pdf-chat",
  "sourceParams": {},
  "planParams": {
    "maxPartitionsPerPIndex": 64,
    "indexPartitions": 16,
    "numReplicas": 0
  }
}
Setup
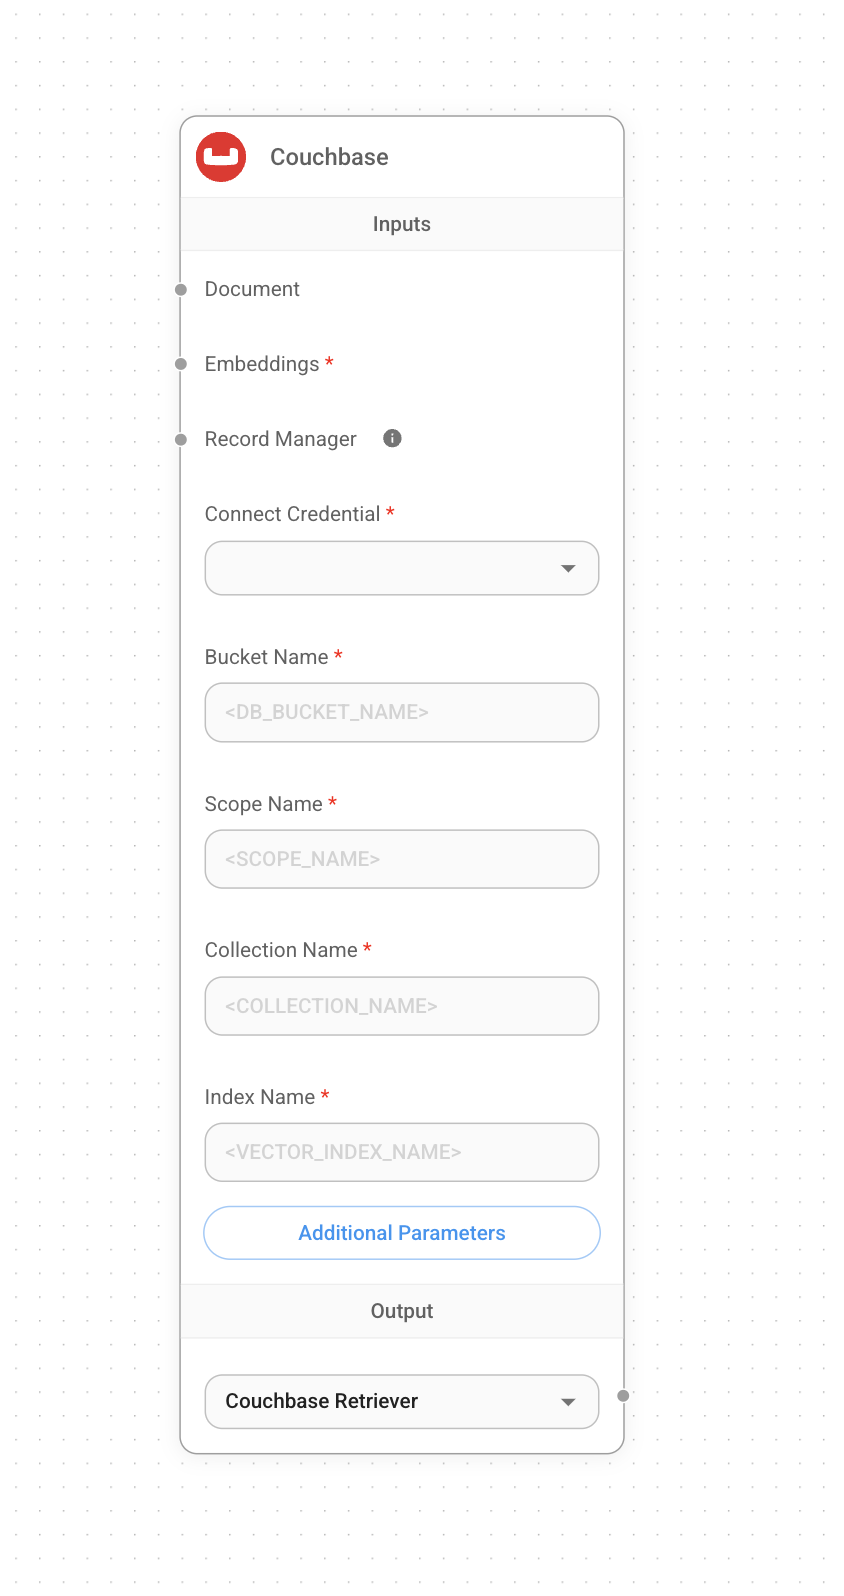
- Add a new Couchbase node on canvas and fill in the Bucket Name, Scope Name, Collection Name and Index Name
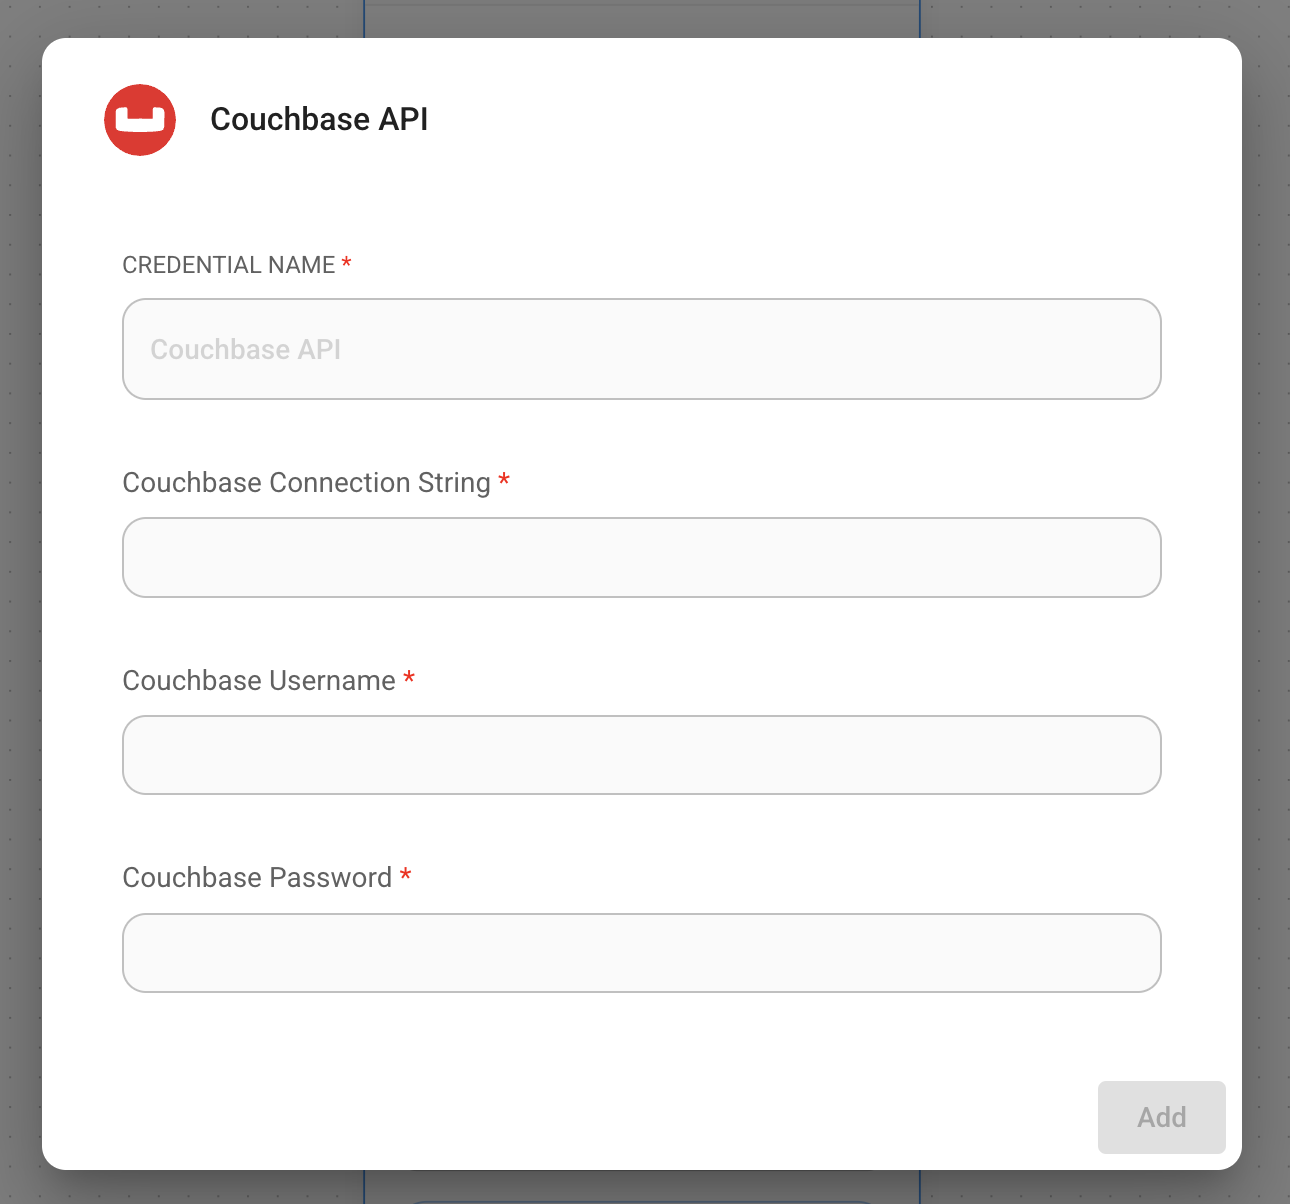
- Add new credential and fill in the parameters:
- Couchbase Connection String
- Cluster Username
- Cluster Password
- Add additional nodes to canvas and start the upsert process
- Document can be connected with any node under Document Loader category
- Embeddings can be connected with any node under Embeddings category
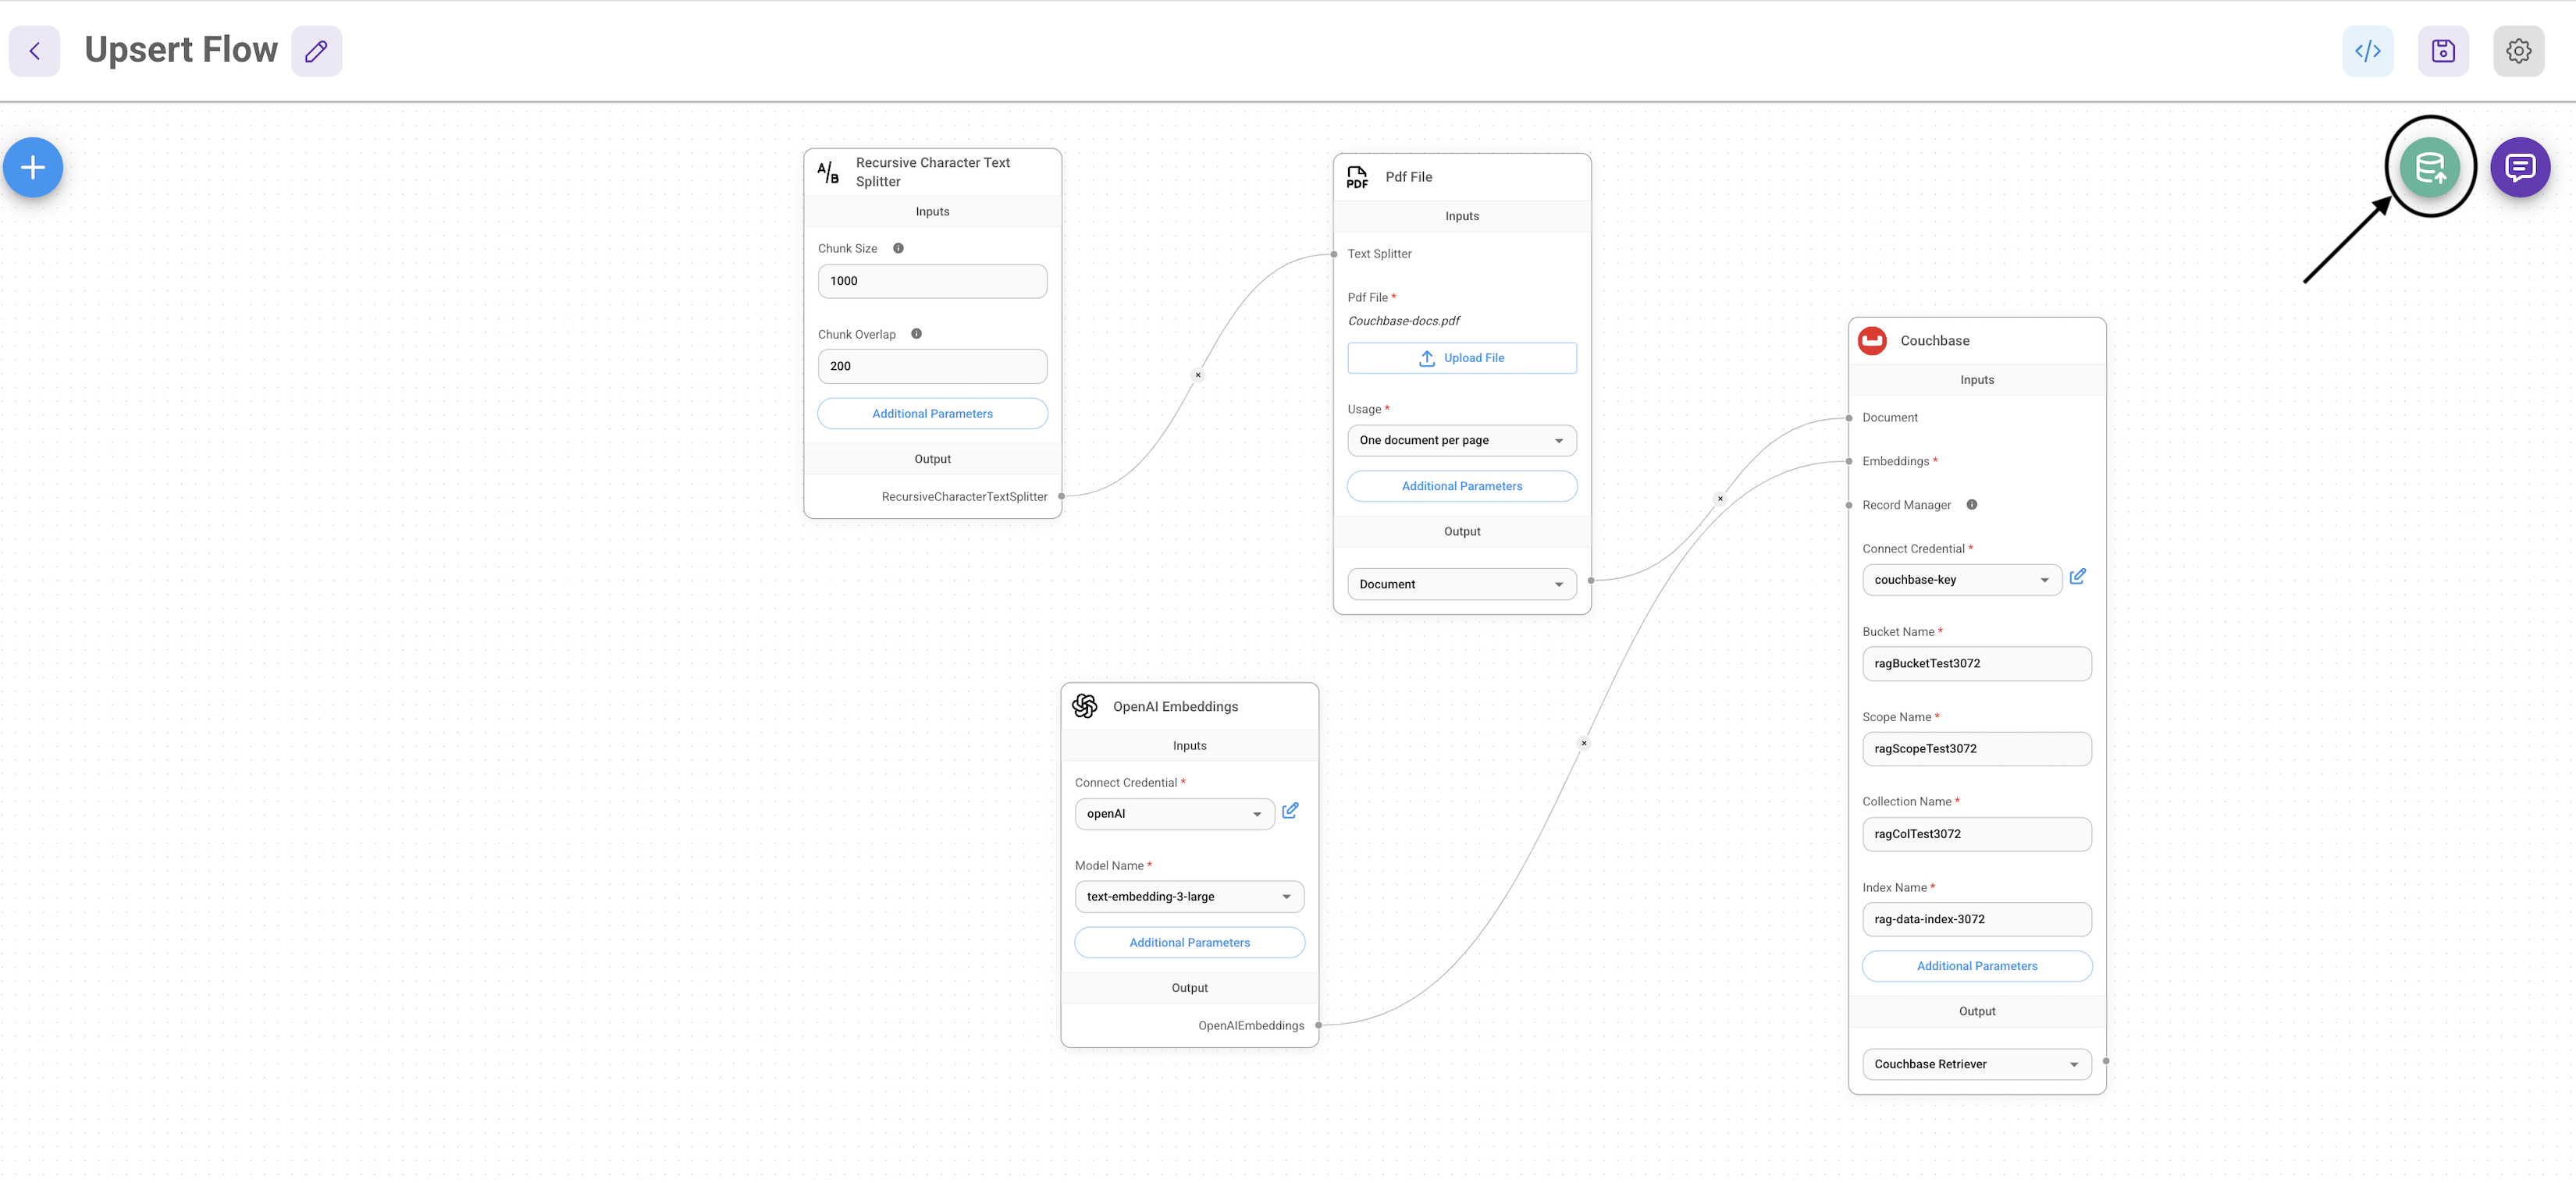
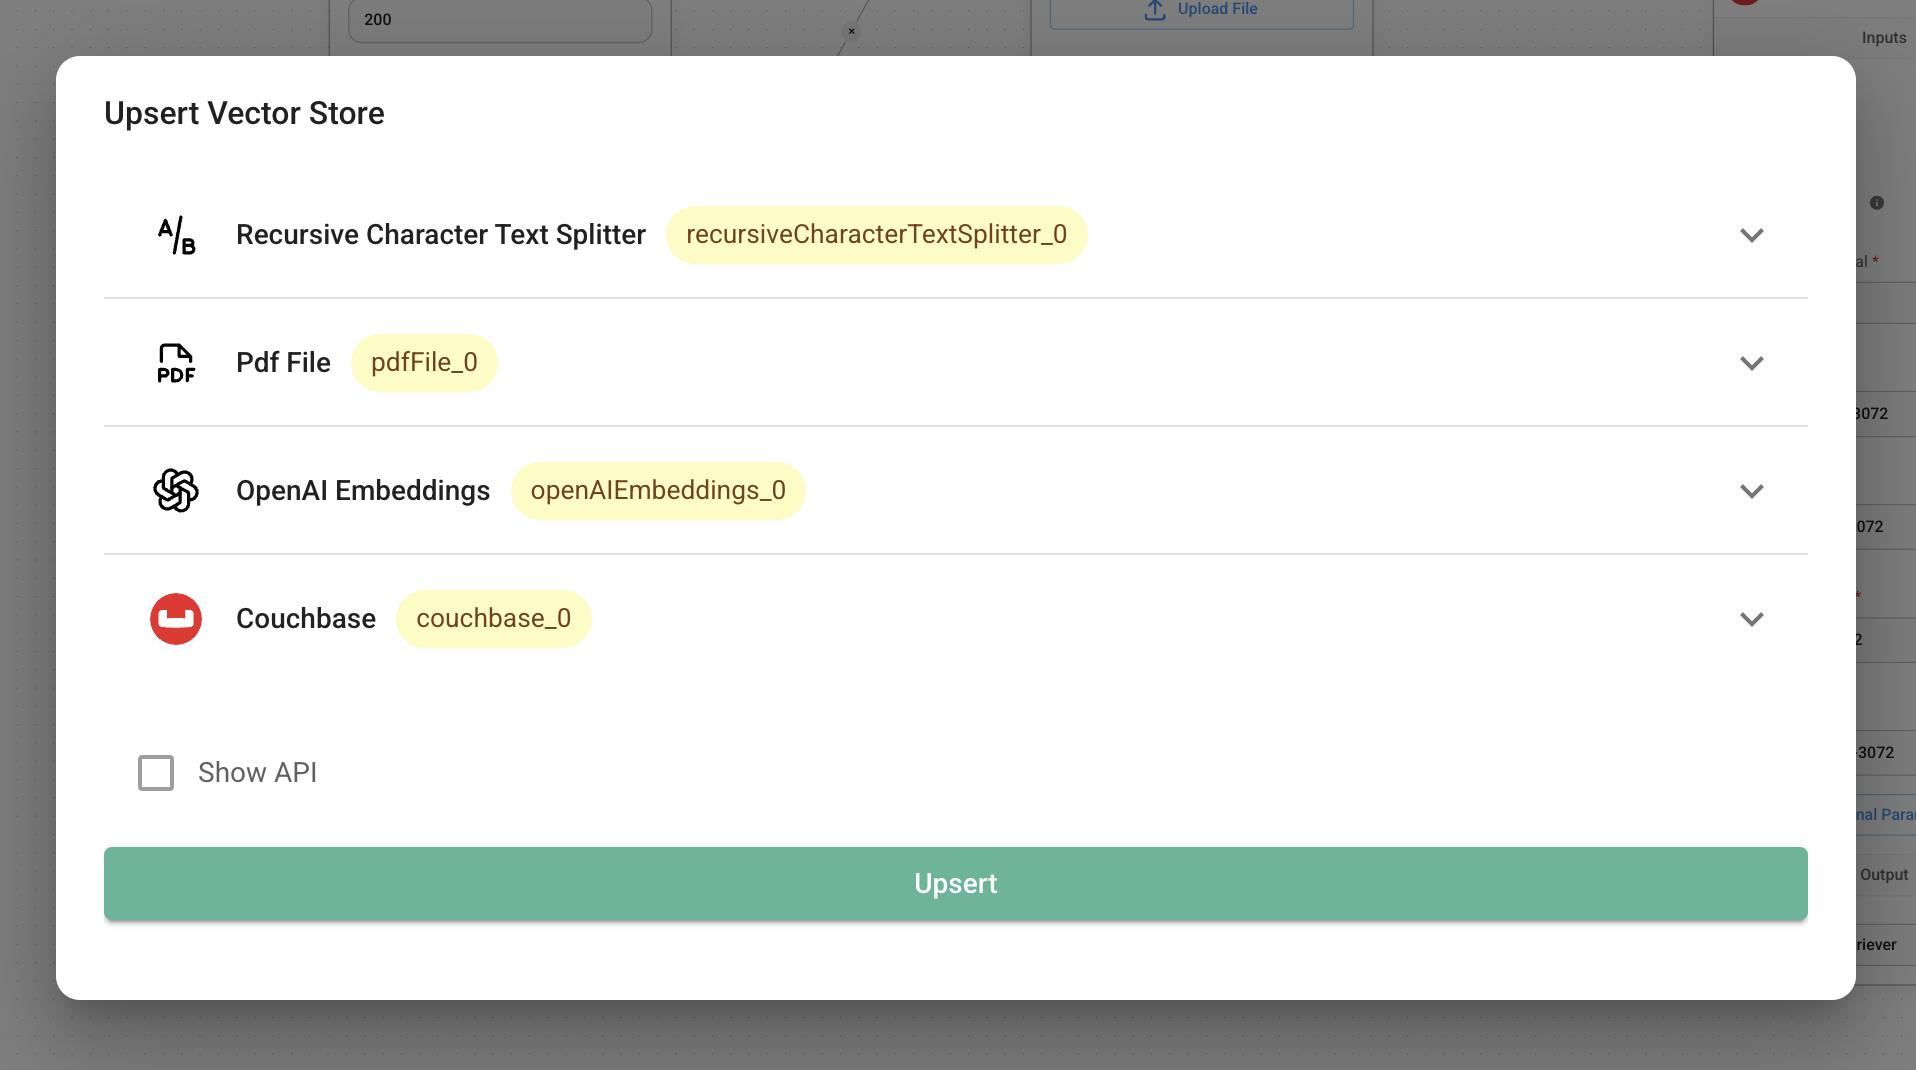
- Verify from the Couchbase UI to see if data has been successfully upserted!
Resources
- LangChain Couchbase vectorstore integrations
- Refer to the Couchbase Documentation to learn about Couchbase.