Device Management
Every phone (and, in future, other device types) connected to your PebbleAI account is managed from one place: the Devices section of your web Settings page. This is where new devices are approved, and where you rename or revoke the ones you have. Revoking a device signs it out everywhere, immediately.
Where to find it
- Open Settings → Profile, or go directly to
/settings/profile?section=deviceson your PebbleAI site - Pick Devices from the left-hand menu (“Connected apps and devices”)
The section is headed Devices, with the summary: “Apps and devices connected to your Pebble AI workspace. A new device must be approved here before it can connect; revoking a device signs it out everywhere.”
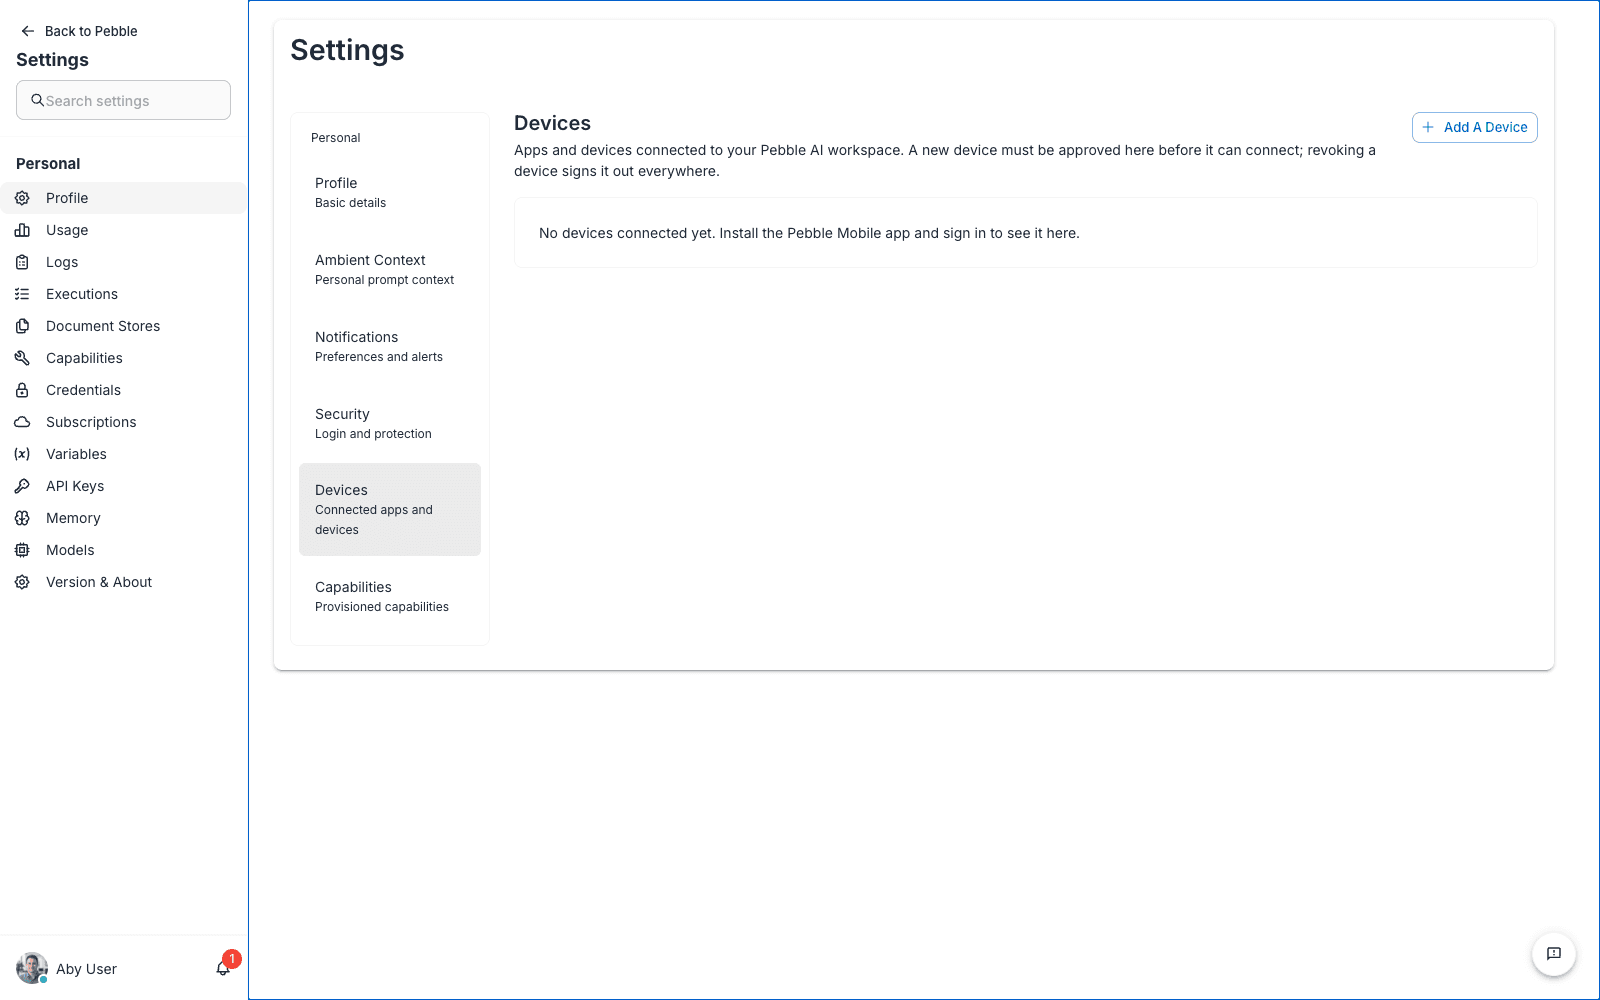
If you haven’t connected anything yet, you’ll see: “No devices connected yet. Install the Pebble Mobile app and sign in to see it here.” — Getting Started covers pairing your first device.
The device list
Each device row shows:
| Element | Detail |
|---|---|
| Type icon and label | iPhone, Android, Tablet, or Pebble Puck |
| Name | The device’s name — editable (see renaming below) |
| Caption | Type and platform (model, OS, app version), plus Last seen — Never, Just now, minutes/hours/days ago, or a date |
| Status chip | active (green), pending (amber), revoked (row greyed out), or denied |
The Last seen value is a quick health check — if a phone you use daily says it was last seen days ago, something’s wrong (or it’s in a drawer).
Approving and denying new devices
When a phone completes the pairing flow and you tap Allow on its consent page, it appears here with a pending chip and two icon buttons: a tick (Approve) and a cross (Deny).
- Approve — the device connects and becomes
active(“Device approved”) - Deny — a confirmation dialog explains “This pairing request will be rejected and the device cannot connect.” (“Device denied”)
Approval is deliberately web-only: a device holds no access at all until its owner approves it from a signed-in web session, and a device can never approve itself — even a device that’s already connected can’t approve another one. Pending requests are only valid for 15 minutes; after that the phone has to scan the QR code again.
Renaming a device
Active devices show a pencil icon (Rename). Click it and the name becomes editable inline — Enter saves, Escape cancels, and a “Device renamed” confirmation appears. Useful when “iPhone” isn’t enough to tell your devices apart.
Revoking a device
Active devices show a bin icon (Revoke). Clicking it opens a confirmation dialog: “The device is signed out immediately and must be re-authorized to reconnect.”
What revoking actually does:
- The device’s stored credentials are invalidated immediately — it can no longer refresh its access
- Any access token the device still holds dies within minutes (15 minutes at most on default settings)
- To come back, the device has to go through the full pairing and approval flow again
Revoke a device the moment a phone is lost, stolen, sold, or handed back to IT. There’s no way for the device to quietly reconnect afterwards.
How device security works
A few properties of the Device Layer worth knowing, especially if you’re the one answering security questions:
- Devices never hold your password. Pairing issues the device its own device-bound tokens — short-lived access tokens plus a rotating refresh token.
- Refresh tokens are single-use. Each refresh rotates the token. If a stale refresh token is ever presented — the signature of a stolen token being replayed — PebbleAI treats it as theft and automatically revokes the device.
- Device tokens never create a browser session. A paired phone can call the API as you, but its tokens are useless for signing in to the web. Web sign-in is unchanged.
- Token lifetimes (15-minute access, 30-day refresh) are deployment defaults and can be tuned by your platform team.
For admins
Device permissions
Three organisation-scoped permissions govern devices:
| Permission | Label | Default grants |
|---|---|---|
devices:view | View My Connected Devices | Org admin and the default user role |
devices:manage | Rename and Revoke My Devices | Org admin and the default user role |
devices:org-view | View All Organization Devices | Org admin |
In practice: ordinary users can pair, rename, and revoke their own devices out of the box — no admin action needed. Approving and denying pairing requests is owner-only regardless of role, and is rejected outright for calls made with a device token, so a device can never approve itself or another device.
devices:org-viewis granted to admin roles, but the org-wide device dashboard it’s designed for hasn’t shipped yet — there is currently no admin UI listing every device in the organisation.
Roles and permissions are managed in Organisation Configuration.
Install links for the Add a device dialog
The iOS and Android buttons in the Add a device dialog open the installation links provided for your PebbleAI site. Use the button for your phone to install Pebble Mobile, then follow the pairing steps in the dialog.
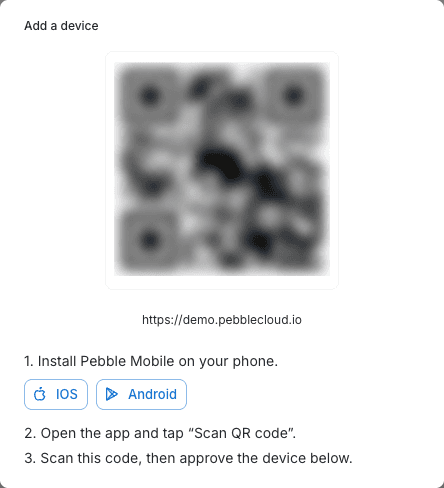
If an installation link is missing or takes you to the wrong app, contact your organisation administrator.
Related
- Getting Started — the pairing flow end to end
- Using the App — what a paired device can do
- Profile & Account — the rest of your Settings page
- Organisation Configuration — roles and permissions