Calling Webhook
This tutorial walks you through creating a custom tool in FlowiseAI that calls a webhook endpoint, passing the necessary parameters in the request body. We will use Make.com to set up a webhook workflow that sends messages to a Discord channel.
Setting Up a Webhook in Make.com
-
Sign up or log in to Make.com.
-
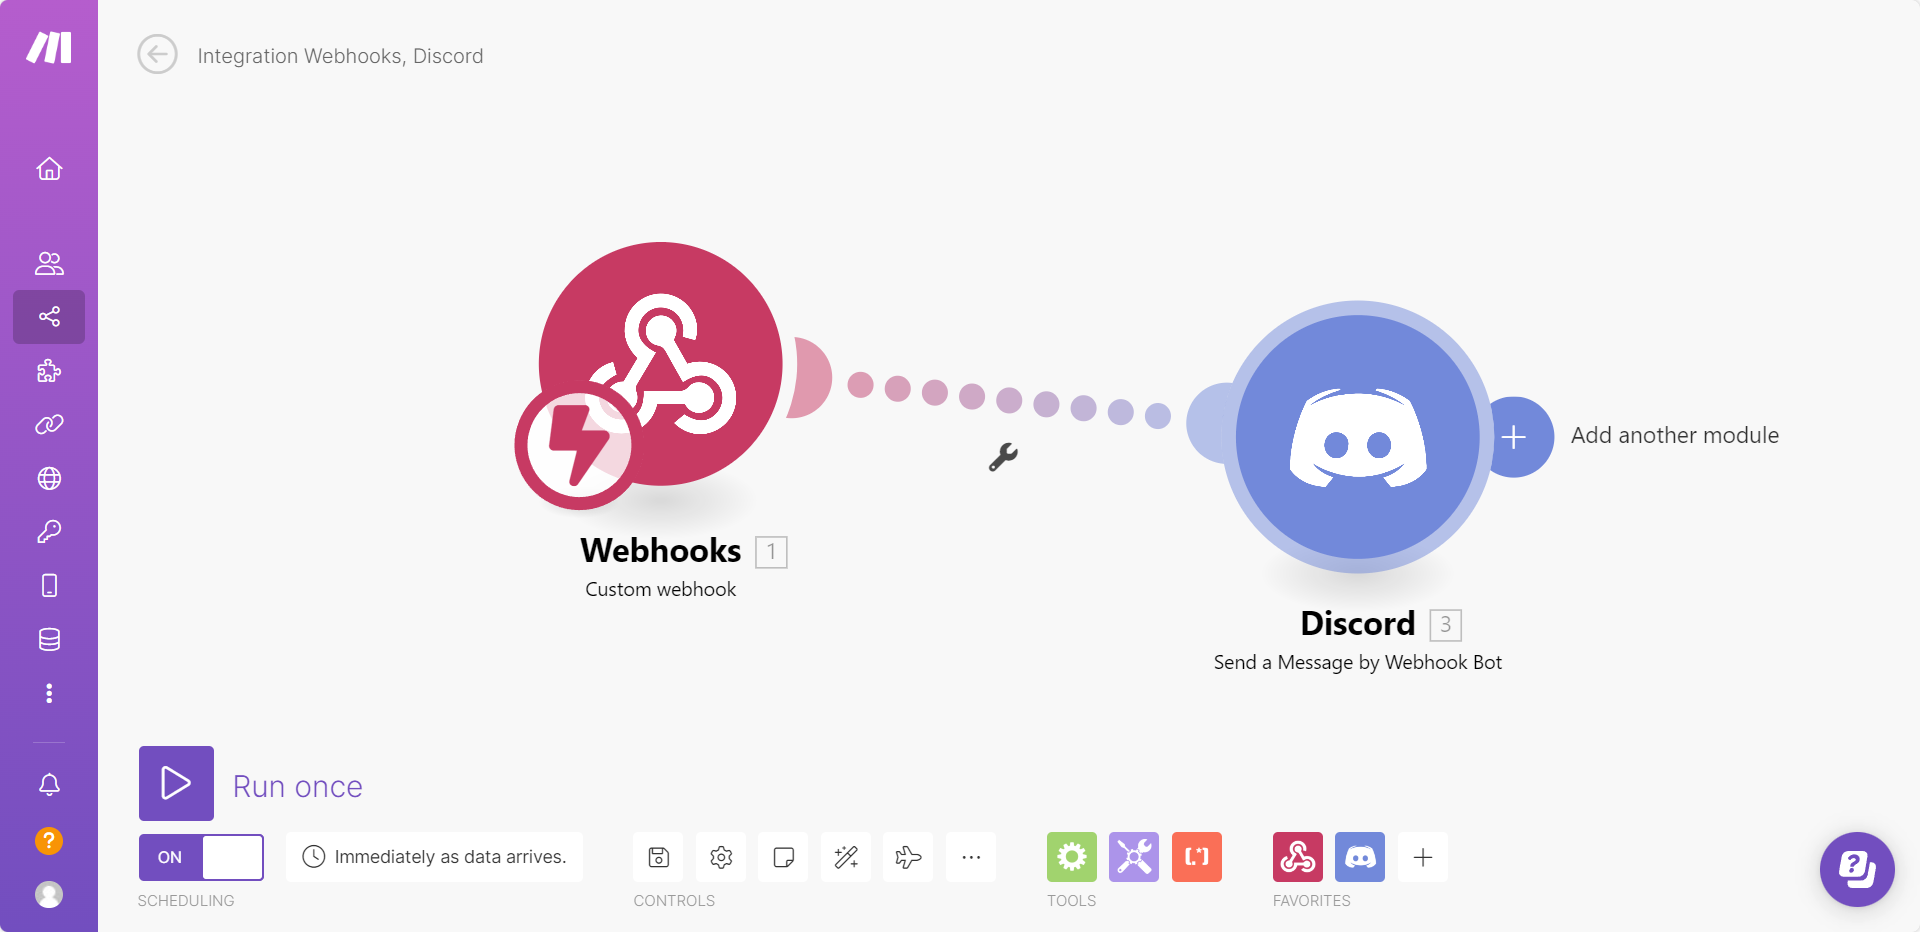
Create a new workflow containing a Webhook module and a Discord module, as shown below:
-
From the Webhook module, copy the webhook URL:
.png)
-
In the Discord module, configure it to pass the
messagefrom the webhook body as the message sent to the Discord channel:.png)
-
Click Run Once to start listening for incoming requests.
-
Send a test POST request with the following JSON body:
{ "message": "Hello Discord!" }.png)
-
If successful, you will see the message appear in your Discord channel:
.png)
Congratulations! You have successfully set up a webhook workflow that sends messages to Discord. 🎉
Creating a Webhook Tool in FlowiseAI
Next, we will create a custom tool in FlowiseAI to send webhook requests.
Step 1: Add a New Tool
-
Open the FlowiseAI dashboard.
-
Click Tools, then select Create.

-
Fill in the following fields:
Field Value Tool Name make_webhook(must be in snake_case)Tool Description Useful when you need to send messages to Discord Tool Icon Src Flowise Tool Icon -
Define the Input Schema:
.png)
Step 2: Add Webhook Request Logic
Enter the following JavaScript function:
const fetch = require('node-fetch');
const webhookUrl = 'https://hook.eu1.make.com/abcdef';
const body = {
    "message": $message
};
const options = {
    method: 'POST',
    headers: {
        'Content-Type': 'application/json'
    },
    body: JSON.stringify(body)
};
try {
    const response = await fetch(webhookUrl, options);
    const text = await response.text();
    return text;
} catch (error) {
    console.error(error);
    return '';
}-
Click Add to save your custom tool.
.png)
Step 3: Build a Chatflow with Webhook Integration
-
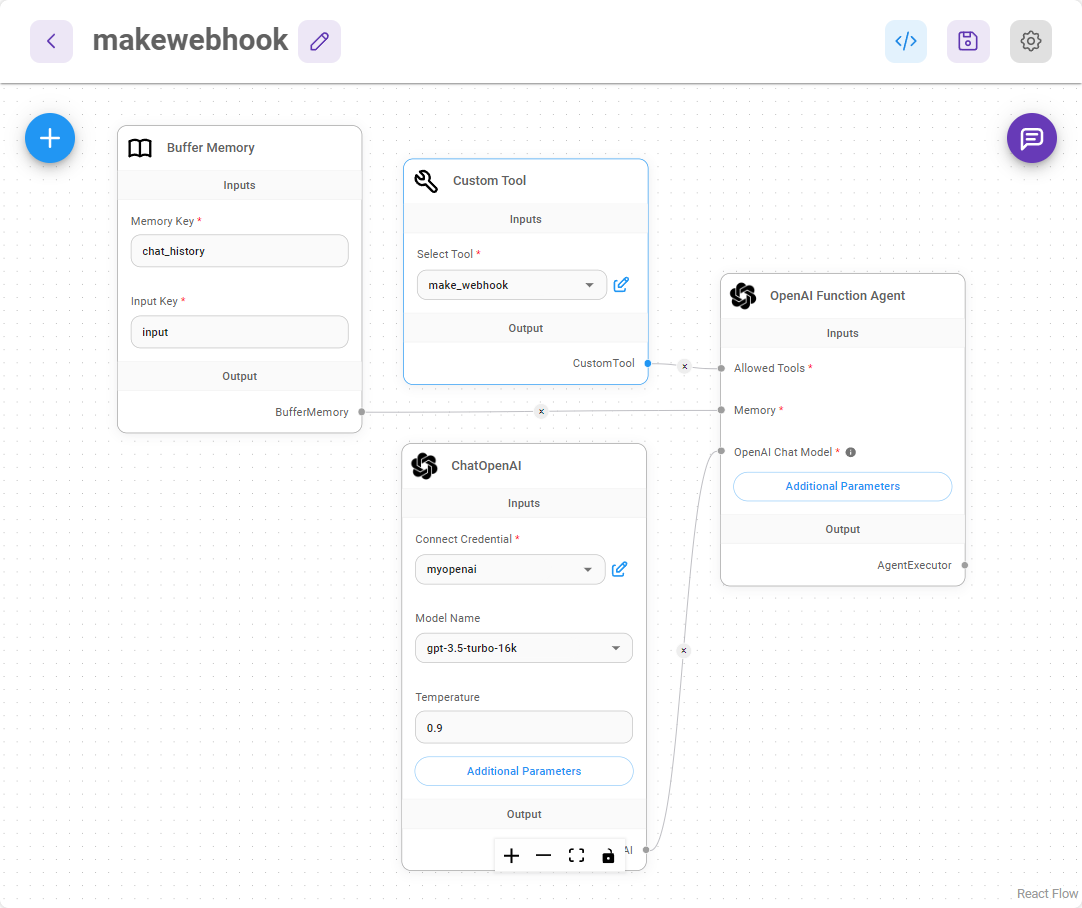
Create a new canvas and add the following nodes:
- Buffer Memory
- ChatOpenAI
- Custom Tool (select
make_webhook) - OpenAI Function Agent
-
Connect them as shown:
-
Save the chatflow and start testing it.
Step 4: Sending Messages via Webhook
Try asking the chatbot a question like:
“How to cook an egg?”
Then, request the agent to send this information to Discord:
.png)
You should see the message appear in your Discord channel:
.png)
Alternative Webhook Testing Tools
If you want to test webhooks without Make.com, consider using:
- Beeceptor – Quickly set up a mock API endpoint.
- Webhook.site – Inspect and debug HTTP requests in real-time.
- Pipedream RequestBin – Capture and analyze incoming webhooks.
More Tutorials
-
Watch a step-by-step guide on using webhooks with Flowise custom tools:
-
Learn how to connect Flowise to Google Sheets using webhooks:
-
Learn how to connect Flowise to Microsoft Excel using webhooks:
By following this guide, you can trigger webhook workflows dynamically and extend automation to various services like Gmail, Google Sheets, and more.